Thursday, June 29, 2017

Parameterizing Jmeter for testing APEX

A while ago we needed to stress a system by using the APEX Brookstrut demo application.  The obvious choice for this was Jmeter.  How to setup Jmeter to record web traffic by becoming a web proxy is very known and well written process.  Anyone that hasn't seen it, check this PDF and you can see how easy it is. There were a couple issues to get around. First importing the application again and again which may get a different Application ID with each import. Next is the hostname and port may change depending on the environment. Then there's using the same session ID in apex to avoid generating a new session more than needed.

That led to this setup.

Configuration

The first 3 parts are for tracking the cookies, any http header but most important is the User Defined section. In here, I defined variables for the webserver ( aka ORDS ) hostname/port and protocol also the APEX application ID and the Home Page for the test.


The next step down is to define the HTTP Request Defaults. This is where the user variables start to come into play as you can see. The servername/port/protocol are all referencing the variables from above.


Initial Request

The next part of the test is to hit the home page of the application with a bogus session ID. This kicks apex into creating a real session ID.


Now to get that session ID for later I put in the JSR 223 Post Processor seen in the tree right below the test.


The actual javascript for the test is in this Gist:


The javascript is extracting the p_instance, p_flow_id,... which you see at the bottom of the script.  These are then placed into the dictionary for all subsequent requests to reference.


Now the only task left is to go to the recorded test an replace all the recorded parameters which are hardcoded to specific flowid, sessionid,.. and replace them with the variables from the dictionary.  For example this shows the ${p_flow_id} and ${_instance}


Now there's a recorded parameterized test that can be changed to point to any installation of an application quite easily.



Thursday, June 01, 2017

Oracle REST Data Services and Docker

TL;DR


1) check out https://github.com/krisrice/docker-ords-sqlcl-apex
2) Download ORDS , SQLcl; optionally APEX
3) Build w/DB connection details
docker build -t krisrice/ords:3.0.10  --build-arg DBHOST=192.168.3.119 --build-arg DBSERVICE=orcl --build-arg DBPORT=1521 --build-arg DBPASSWD=oracle  .
4) Run the image
docker run -d -p 8888:8888 -p 8443:8443 --name=ords krisrice/ords:3.0.10
5) Access https://localhost:8433/ords/apex


GitHub Project

I started a spot in github for me to adjust a docker build as I need it.  There will be an official Oracle one published along side all the existing ones that has out on https://github.com/oracle/docker-images 

This is where I'll be learning what ords needs out of a docker.  https://github.com/krisrice/docker-ords-sqlcl-apex

The Build Structure

This docker is using the docker build arguments for passing in any information needed such as the db connect details to install ORDS and APEX. These are passed one by one with the --build-args X=Y. The initial ones include:
DBHOST    : IP Address of the database host
DBSERVICE : DB Service name to connect
DBPORT    : DB Port to connect
DBPASSWD  : SYS password
Optional
PORT  : HTTP Port for ORDS (Default: 8888)
SPORT : HTTPS Port for ORDS (Default: 8443)
APEXI : path to the apex images folder INSIDE the doc
These will expand to allow things like custom SSL cert loading, migrate apex REST -> ords REST, conn pool sizes,.... So best to check on the README in the project as I'll keep that up to date.

The build process itself is a fairly easy to follow bash script. There are a couple notable things in the build ( setupOrds.sh )

  1. It randomizes the passwords for the ORDS DB accounts used. It does the alter db user then burns the passwords into the ORDS configuration.
  2. It creates a docroot for serving up any files located at /opt/oracle/ords/doc_root

Optional Software

IF APEX is downloaded, it will install/upgrade the target database. This installs APEX, setups the APEX REST config, and sets the /i/ to the /opt/oracle/apex/images folder so it's ready to go.

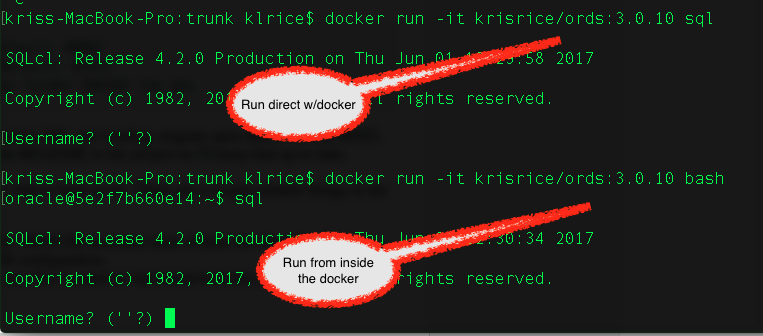
IF SQLcl is download, it is installed into the image


Running the Image

There's a couple gotchas I've found running the image.

  1. Could be my setup but the EXPOSE option in the Dockerfile doesn't work for me to have the ORDS on localhost:8888.  This means the -p flag is needed to expose the port inside the docker image to the host machine.
  2. To run the image in the background simply give a -d 
  3. To get the logs of the image running in the background docker has a nice docker logs <container name> The trouble is the container name is randomly generated unless the --name=<NAME> is used.
This is how I start the image.

docker run -d -p 8888:8888 -p 8443:8443 --name=ords krisrice/ords:3.0.10


The build

IF the APEX is part of the build and is installing/updating, it will take longer than this.  Here's about 1 minute from nothing to up and running with ORDS and APEX in this docker image.